


Say Goodbye to Pesky Plantar Warts on Your Finger!
Plantar warts are a common skin condition that can be both unsightly and uncomfortable. When they appear on your finger, they can be particularly bothersome and difficult to get rid of. But fear not, because with the right treatment and Care, you can eliminate plantar warts on your finger for good!
Image Source: i0.wp.com
First and foremost, it’s important to understand what plantar warts are and how they develop. Plantar warts are caused by the human papillomavirus (HPV) and typically appear on the soles of your feet. However, they can also develop on other parts of your body, including your fingers. These warts are characterized by their rough, grainy texture and may have small black dots in the center.
To effectively eliminate plantar warts on your finger, it’s essential to follow a few key steps. Here’s your ultimate guide to banishing those pesky warts once and for all:
1. Consult a Healthcare Professional:
Before attempting to treat plantar warts on your finger, it’s important to consult a healthcare professional. They can accurately diagnose the warts and recommend the best course of treatment based on their size and location. In some cases, they may suggest over-the-counter treatments, while in more severe cases, they may recommend professional medical interventions.
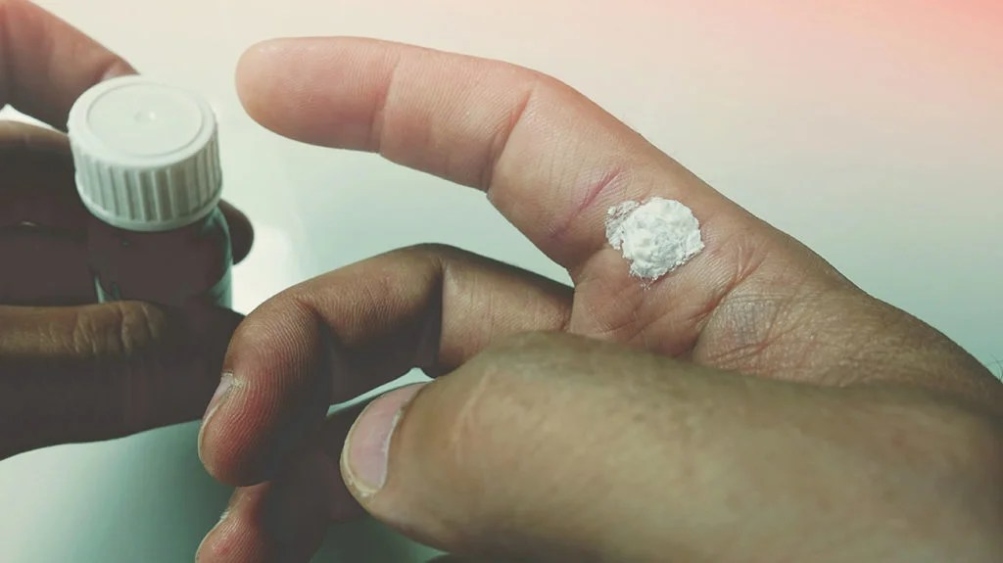
2. Use Topical Treatments:
One of the most common ways to treat plantar warts on your finger is with topical treatments. These treatments typically contain salicylic acid, which works by gradually breaking down the wart tissue. To use these treatments effectively, follow the instructions carefully and be consistent with your application. It may take several weeks to see results, so patience is key.
3. Try Cryotherapy:
Another effective treatment for plantar warts on your finger is cryotherapy. This involves freezing the wart with liquid nitrogen, which causes the wart to die and fall off. While this treatment can be done at Home with over-the-counter freeze sprays, it’s best to have it done by a healthcare professional for optimal results.
4. Protect Your Finger:
While treating plantar warts on your finger, it’s important to protect the affected area to prevent the warts from spreading or recurring. Keep your finger clean and dry, and avoid picking or scratching at the warts. You may also consider wearing gloves or bandaging the wart to prevent the virus from spreading to other parts of your body.
With the right treatment and care, you can say goodbye to pesky plantar warts on your finger for good! Remember to consult a healthcare professional for personalized advice and follow their recommendations closely. By being proactive and consistent with your treatment, you can successfully eliminate plantar warts and enjoy clear, healthy skin once again.
4 Foolproof Steps to Banish Plantar Warts for Good
Are you tired of dealing with those pesky plantar warts on your finger? Have you tried everything to get rid of them but nothing seems to work? Well, fret not, because we have the ultimate guide to help you eliminate those plantar warts for good!
Step 1: Understand the Enemy
Before you can effectively banish plantar warts, it’s important to understand what they are and how they develop. Plantar warts are caused by the human papillomavirus (HPV) and are highly contagious. They often appear as small, rough bumps on the skin and can be painful when pressure is applied. Knowing your enemy is the first step in successfully eliminating plantar warts.
Step 2: Treat with Over-the-Counter Remedies
There are several over-the-counter remedies that can help in eliminating plantar warts on your finger. Salicylic acid is one of the most common treatments, as it helps to break down the wart and gradually remove it from the skin. You can find salicylic acid in the form of gels, pads, or plasters at your local pharmacy. Simply follow the instructions on the packaging and apply the treatment regularly until the wart disappears.
Step 3: Try Home Remedies
If over-the-counter treatments aren’t doing the trick, you may want to try some home remedies to banish plantar warts for good. One popular home remedy is duct tape therapy, where you cover the wart with duct tape for a period of time to suffocate it. Another option is using apple cider vinegar, which has antiviral properties that can help eliminate plantar warts. Be sure to research home remedies thoroughly before trying them to ensure they are safe and effective.
Step 4: Consult a HealthCare Professional
If all else fails, it may be time to consult a healthcare professional to help you eliminate plantar warts on your finger. A dermatologist can provide more advanced treatments such as cryotherapy (freezing the wart), laser therapy, or surgical removal. These treatments are typically more effective than over-the-counter or home remedies and can help you get rid of plantar warts once and for all.
By following these four foolproof steps, you can finally banish plantar warts for good and enjoy smooth, wart-free skin on your finger. Remember to be patient and consistent with your treatment, as eliminating plantar warts can take time. With the right approach and perseverance, you can say goodbye to those pesky plantar warts and hello to healthy, wart-free skin. So don’t let plantar warts get you down – take control of your skin and eliminate those warts once and for all!
Your Comprehensive Guide to Finally Eliminating Plantar Warts
Plantar warts on your finger can be a pesky and frustrating issue to deal with. They can be unsightly and sometimes even painful, making it difficult to go about your daily activities with ease. If you’re tired of trying to cover up your plantar warts or dealing with the discomfort they bring, then look no further. This comprehensive guide will provide you with all the information you need to finally eliminate those stubborn plantar warts for good!
First and foremost, it’s important to understand what plantar warts are and how they develop. Plantar warts are caused by the human papillomavirus (HPV) and can appear on any part of the body, including the fingers. They often show up as small, rough growths that can be flesh-colored, white, pink, or brown. Plantar warts on the fingers are typically spread through direct contact with the virus, such as touching someone else’s wart or a contaminated surface.
Now that you have a better understanding of what plantar warts are, let’s dive into the steps you can take to finally eliminate them from your finger for good:
1. Consult a HealthCare Professional: Before attempting any at-Home remedies, it’s important to consult a healthcare professional to properly diagnose the plantar warts on your finger. They can provide you with a personalized treatment plan based on the severity of your warts and your medical history.
2. Over-the-Counter Treatments: There are several over-the-counter treatments available for plantar warts, such as salicylic acid patches or gels. These treatments work by gradually wearing down the wart and stimulating the immune system to fight off the virus. Be sure to follow the instructions carefully and be patient as it may take several weeks for the wart to disappear.
3. Natural Remedies: If you prefer a more natural approach, there are several home remedies that may help eliminate plantar warts on your finger. Some popular options include applying tea tree oil, apple cider vinegar, or garlic to the affected area. These remedies are thought to have antiviral properties that can help combat the HPV virus.
4. Cryotherapy: Cryotherapy is a medical treatment that involves freezing the wart with liquid nitrogen. This process causes the wart to blister and eventually fall off, allowing healthy skin to grow in its place. Cryotherapy is typically performed by a healthcare professional and may require multiple treatments for complete wart removal.
5. Surgical Removal: In severe cases where other treatments have failed, surgical removal of the plantar wart may be necessary. This procedure is typically done under local anesthesia and involves cutting or scraping off the wart. It’s important to follow post-operative care instructions to prevent infection and promote proper healing.
6. Preventative Measures: Once you have successfully eliminated the plantar wart on your finger, it’s important to take preventative measures to avoid future outbreaks. This includes washing your hands regularly, avoiding direct contact with warts, and keeping your immune system strong through a healthy diet and regular exercise.
By following these comprehensive steps, you can finally say goodbye to those pesky plantar warts on your finger for good! Remember to be patient and consistent with your treatment plan, as it may take time for the wart to completely disappear. With determination and the right approach, you can successfully eliminate plantar warts and enjoy smooth, healthy skin on your finger once again.
Bid Farewell to Plantar Warts on Your Finger Once and for All!
Plantar warts can be a pesky and annoying problem, especially when they decide to make an appearance on your finger. Not only can they be unsightly, but they can also be painful and uncomfortable. If you’re tired of dealing with these stubborn warts, then you’ve come to the right place. In this ultimate guide, we’ll show you how to eliminate plantar warts on your finger for good!
Step 1: Identify the Problem
The first step in getting rid of plantar warts on your finger is to correctly identify the problem. Plantar warts are small, grainy growths that usually appear on the bottom of your feet. However, they can also develop on other parts of your body, including your fingers. They are caused by the human papillomavirus (HPV) and can be easily spread through direct contact.
If you notice a small, rough bump on your finger that looks similar to a callus but has tiny black dots on the surface, chances are you’re dealing with a plantar wart. It’s important to correctly identify the wart before moving on to treatment to ensure you’re using the right methods for removal.
Step 2: Choose the Right Treatment Method
Once you’ve identified the plantar wart on your finger, it’s time to choose the right treatment method. There are several options available, including over-the-counter medications, Home remedies, and medical procedures. Some popular treatments include salicylic acid, duct tape occlusion therapy, and cryotherapy.
Salicylic acid is a common treatment for plantar warts and can be found in various over-the-counter products. It works by breaking down the wart tissue, allowing your immune system to attack the virus causing the wart. Duct tape occlusion therapy involves covering the wart with duct tape to suffocate it, while cryotherapy involves freezing the wart with liquid nitrogen.
Step 3: Be Consistent with Treatment
Consistency is key when it comes to treating plantar warts on your finger. It’s important to follow the instructions for your chosen treatment method Carefully and stick to a regular schedule. If you’re using a medication or home remedy, make sure to apply it as directed and avoid skipping doses.
If you’re undergoing a medical procedure, such as cryotherapy, make sure to follow up with your healthcare provider for any necessary follow-up appointments. Plantar warts can be stubborn and may take several weeks or even months to fully eliminate, so it’s important to be patient and persistent with your treatment.
Step 4: Prevent Future Warts
Once you’ve successfully eliminated the plantar wart on your finger, it’s important to take steps to prevent future warts from developing. Since plantar warts are caused by the HPV virus, it’s important to practice good hygiene and avoid direct contact with infected individuals.
Wearing shoes in public areas, such as locker rooms and swimming pools, can help prevent the spread of the virus. It’s also important to avoid picking or scratching at warts, as this can spread the virus to other areas of your body. Keeping your hands clean and dry can also help prevent the development of new warts.
By following these four foolproof steps, you can bid farewell to plantar warts on your finger once and for all! Remember to correctly identify the problem, choose the right treatment method, be consistent with treatment, and prevent future warts from developing. With a little patience and persistence, you can eliminate plantar warts for good and enjoy healthy, beautiful skin on your fingers.
how to get rid of plantar wart on finger


